
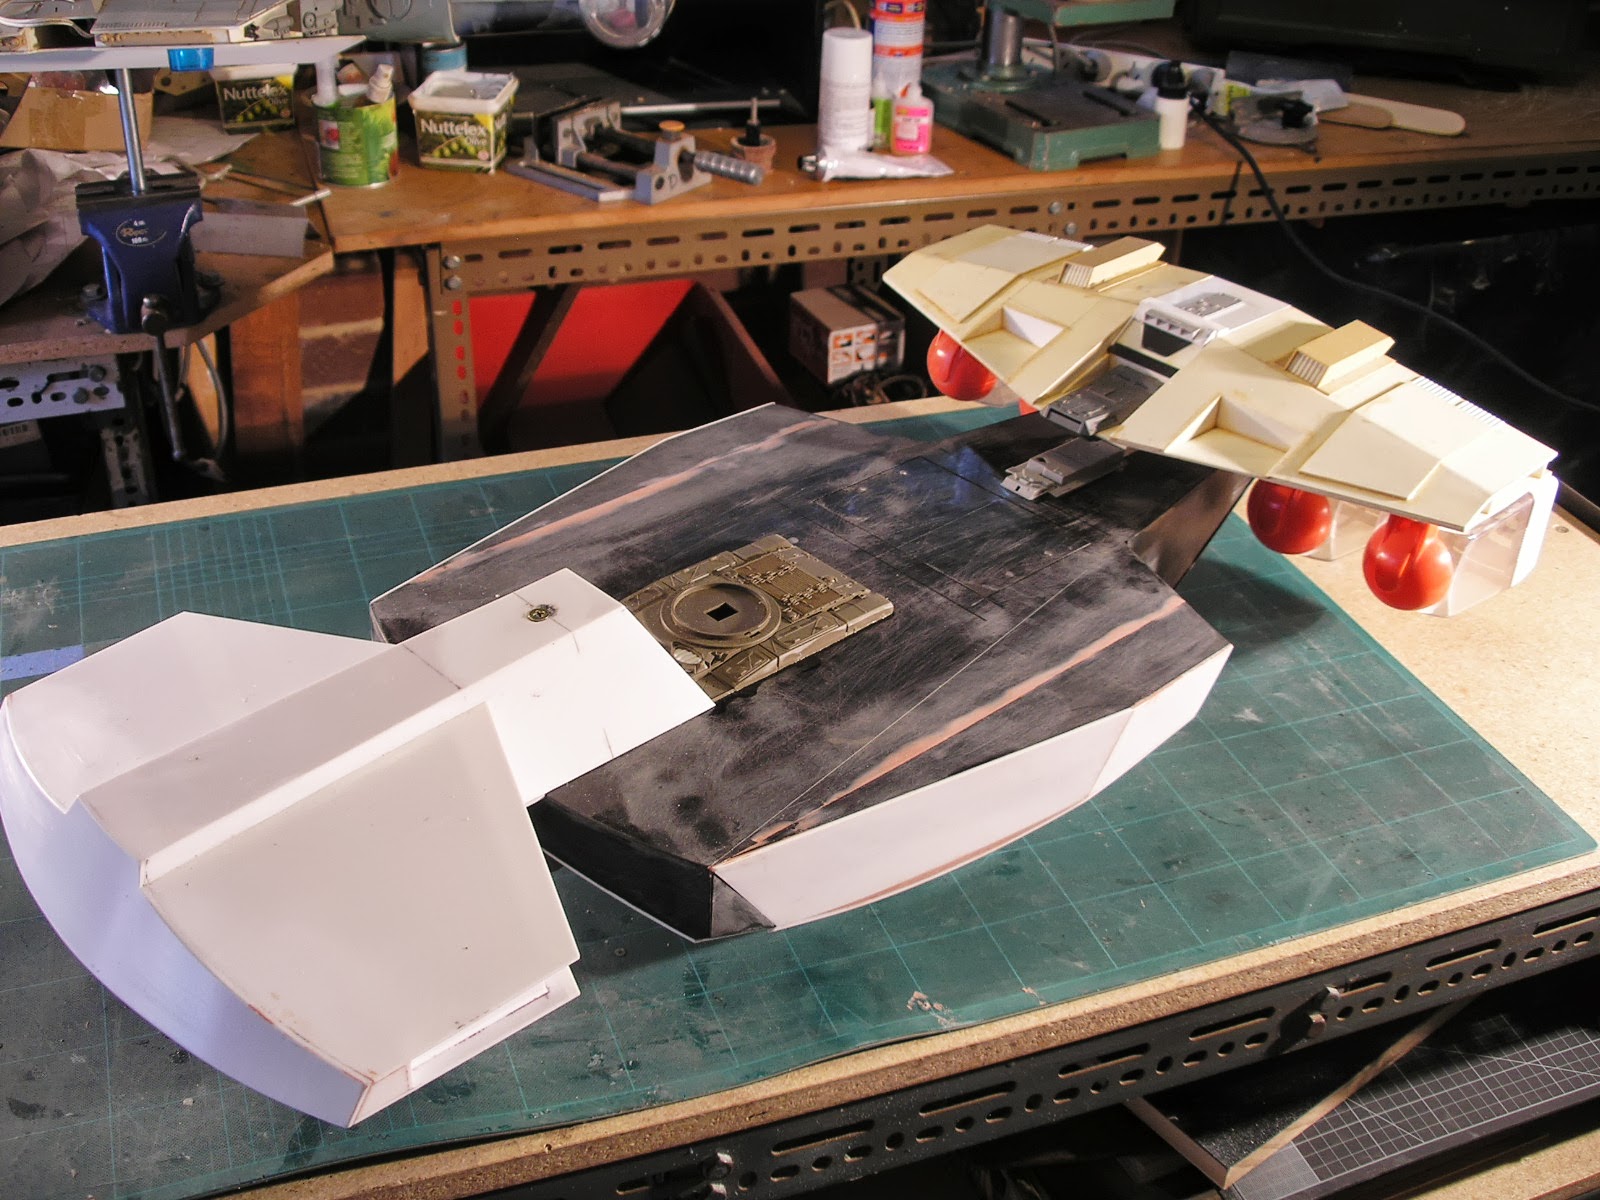
The main hull or thorax section is built from a frame work of ply wood. The top deck is thin 3mm ply and the sides are 6mm ply with lightening holes cut with a holesaw. The rear engine section is made removable for ease of detailing. You can see a M6 TEE nut embedded in the reinforced section at the rear (left). An M6 bolt screws down through a concealed hatch in the engine section to secure. The top surface has black 1mm styrene sheet glued with contact adhesive on it. the white styrene sides are 2mm thick.

There is a block of wood on the top of the thorax that the engine section support strut fits over to locate it. There is also wire with some 4mm connectors to hook up the eventual engine lights( not shown). you can see the wires inside the engines ready for the bright LED down lights I intend to use.
In the old days you had to use 12 volt halogen lamps which pumped out masses of plastic melting heat and needed aluminium heat sinks and cooling air piped in to prevent a gloopy catastrophe. The new 12 volt LED lamps barely even get warm for the same light power output, plus they use so little current you don't need lots of 12 volt transformers to run them.


Plastic ice cream scoops and Parmesan cheese shakers will power this ship to the galaxy and beyond.


This is the underside. The pink filler shows how complicated this bit got where the curved underside meets the straight but angled sides. My cardboard pattern did not account properly for the amount of curvature. I often use cardboard from cereal packets to make up patterns and adjust and cut and change before cutting out relatively expensive plastic.

Below is the under side of the command section. The bridge itself is the top of a coffee grinder. I have put a couple of LED lights from cheap plastic push lights that I get in two sizes from the hardware store for the hemispherical dome shapes. These make very good radar dishes or hemispherical vessel end caps, much cheaper than EMA parts and you get a set of useful LED lights into the bargain. Beware though that there are some nasty even cheaper ( made, not cost) copies made from polyethylene, that have crappy old incandescent bulbs which are useless on both counts, you cant glue or sand them, and the bulbs are rubbish.
In fact when looking for suitable shapes, unless you are going to mold them, steer clear of anything made from polyethylene or polypropylene. These are the waxy flexible plastics which are highly resistant to solvent glues and paint. They are not able to be sanded, they just get furry. If you can stick your thumbnail into it and leave a deep impression it's probably no good.
What you want is anything made from Styrene, ABS and Acrylic. All these can be sanded, glued with a solvent based adhesive and can take paint and filler without any issues.

The Coffee Grinder lid is held in place with another M6 cap screw so as to be able to access the interior lighting.
The LED lighting parts out of the smaller push lamps were running off two AA batteries which is 3 volts. I wired two of them in series giving me 6 volts. I intend to provide one power lead to the model of 12 volts so I need to either add an appropriate resistor or add another 6 volts worth of lighting in series to make it up to 12 volts.

I decided on an under slung concept to the bridge. I guess that format has been made popular in the layout of the Prometheus ship, though I was not consciously following any influence here. I have come to believe that a space ship design works best if certain shapes are echoed across the whole structure. Here I reasoned that the front should remind you of the shape of the rear engine section. It doesn't have to the same, just suggest a commonality that unifies the design. I must admit that it did turn out to look a bit like a vacuum cleaner floor brush head. Mmmm? I'm keeping it... for now.

The front section itself is held in place with a screw and has a plug for the electrical system. It is made from the 2mm styrene.


I used to have a couple of large boxes of plastic shapes salvaged over the years to draw on but in the last house move back to Western Australia I gave most of it away thinking I'll never build a spaceship again. Why do I never learn, I always cycle back to my original interests again at some stage. I'm not suggesting to become one of those crazy TV hoarders but defend your good plastic shape stash, you never know when the bug will bite again, and it will.
My Plastic Kit part collection has also been greatly denuded since the old days and is in serious need of replenishment. I can't believe how bloody expensive they are here in Australia these days. They are half the price on ebay in the US but the USPS postage costs to Australia have virtually doubled overnight making the postage cost as much as the kit is worth, damn the USPS.
On a movie I worked on back in 1988, (an awful film called Salute of the Jugger aka Blood of Heroes) the art department bought a pile of returned model kits from the distributor that had parts missing or badly molded bits. I was able to purchase a massive pile of assorted kits at a bargain basement price. Sadly that resource is all long gone.
Well uncharacteristically for me that's been a huge spurt of posts in a short space of time, 7 posts in 3 days. It will be back to my more usual frequency for a bit, hopefully it wont be too long before the next one.


How's this one going? Have not seen a follow up..
ReplyDeleteYes it has been on the back burner for some time, but it is still on the list to be resumed and I have been thinking about it quite recently.
ReplyDelete